
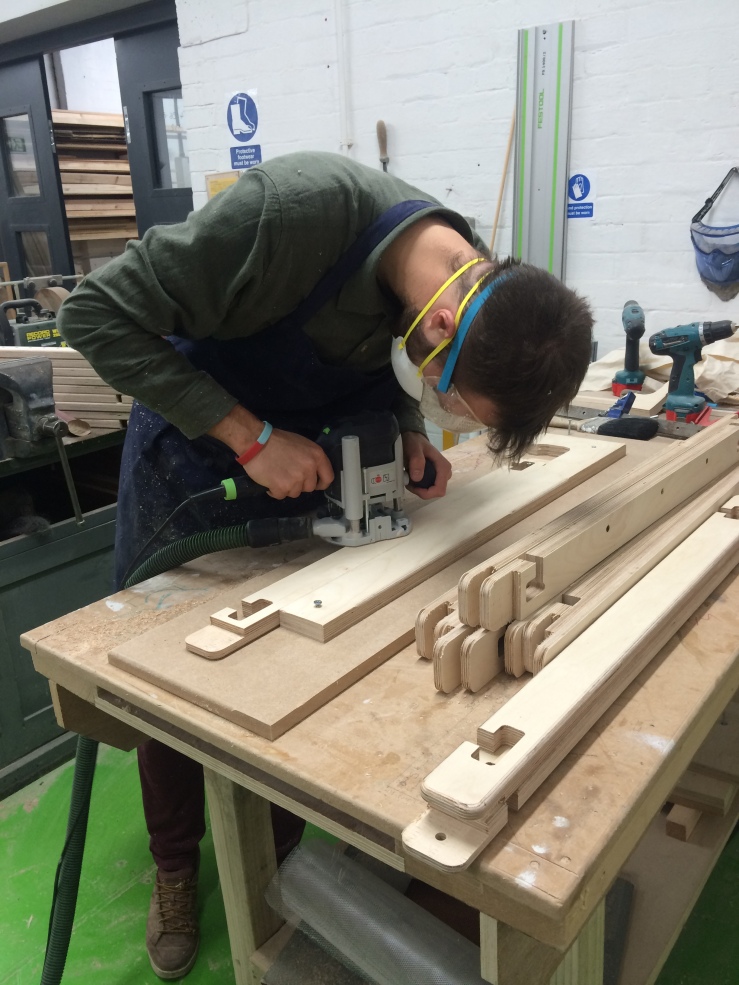
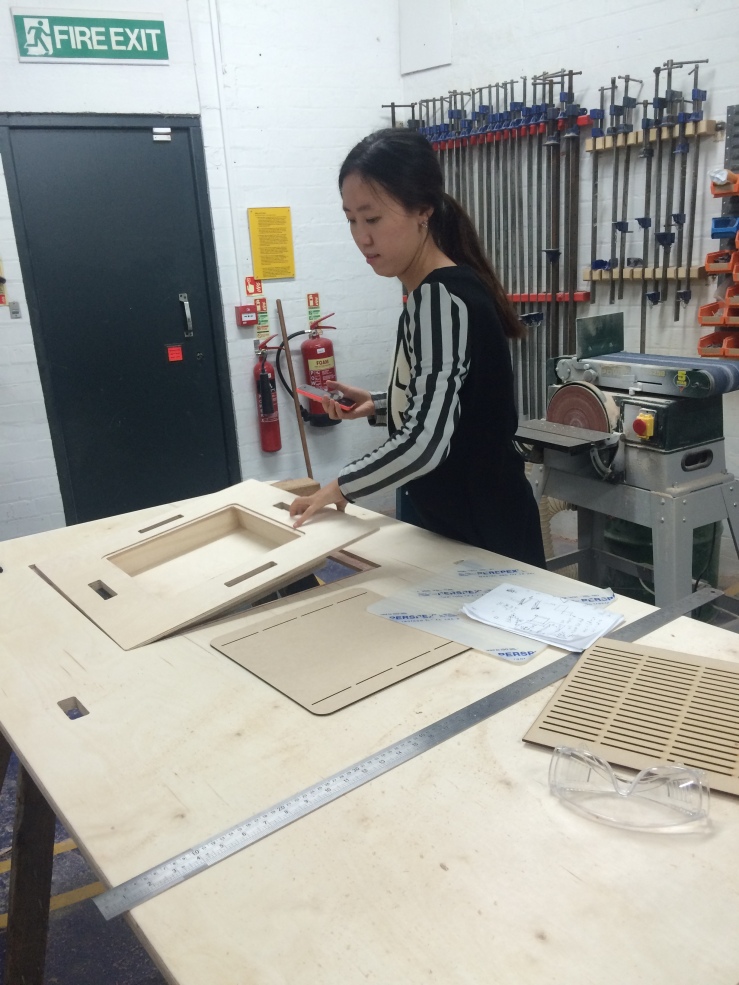
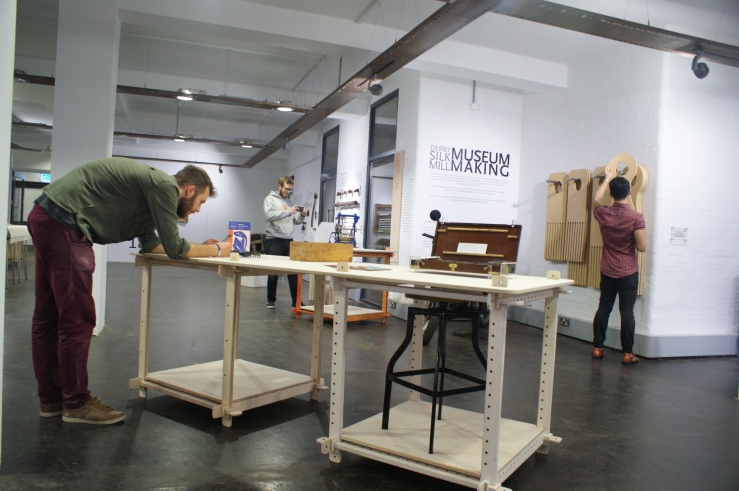
Our final week at the Silk Mill involved finishing our final prototypes ahead of the public Live Project presentations.
Our presentation is viewable online here.

Our final week at the Silk Mill involved finishing our final prototypes ahead of the public Live Project presentations.
Our presentation is viewable online here.
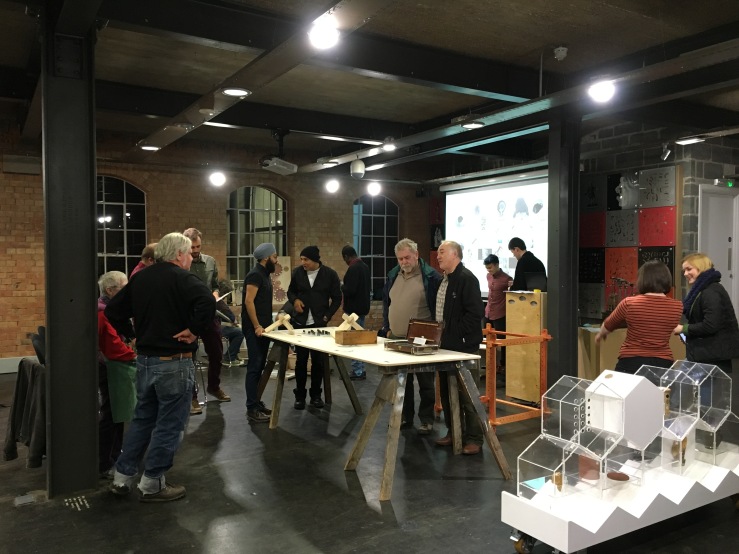
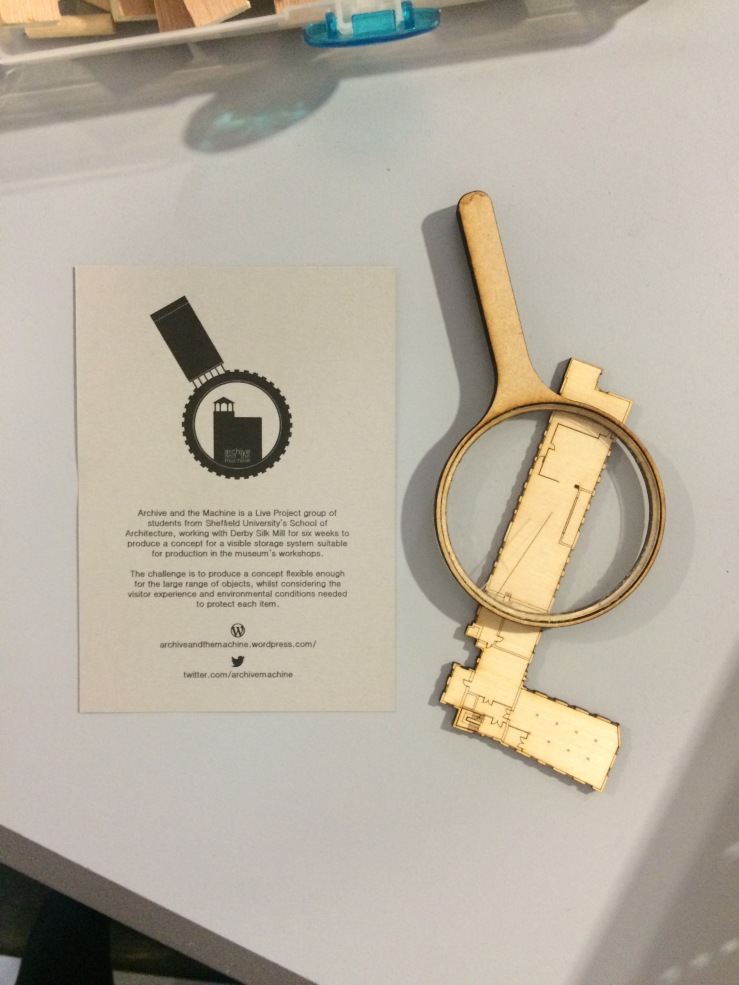
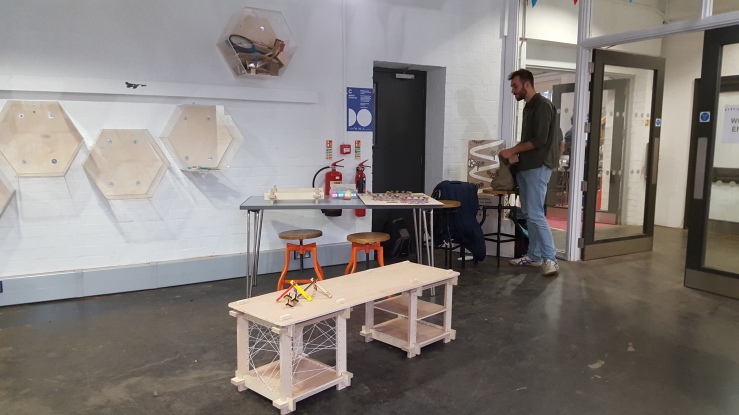
This was the 4th Derby Mini Maker Faire, which showcases “invention, creativity and resourcefulness”. The Derby Silk Mill was transformed into a hub of activity, with over 2600 visitors there to see crafters and their creations. We had a stall in the centre of this maze of invention, inside the mill itself. The stall was created to be eye catching with a variety of colour and hand-made objects.
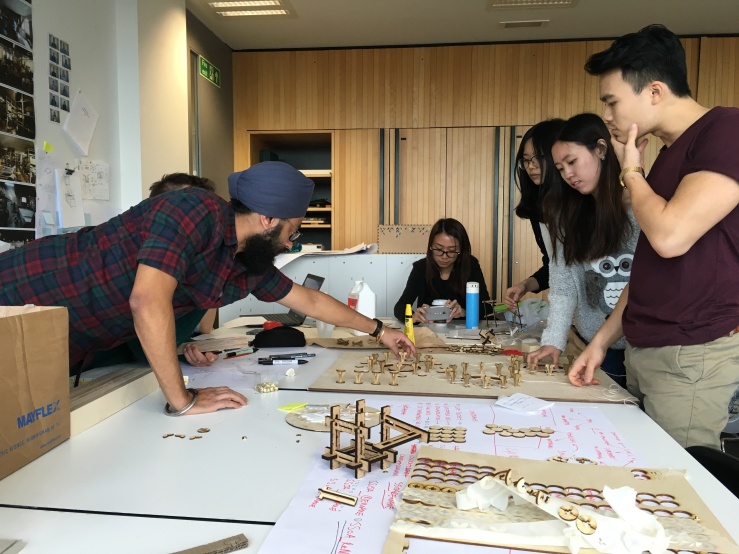
The stall was instantly popular with children because of the interaction they were able to have. The 1:2 scale model of a modular display unit could have been a major reason for this, because it was at a perfect height for children to lean on, and interact with the puzzles laid out on top of it. The children also brought with them an escort of parents and grandparents, which allowed us to engage the older generation too, and explain the project to them.

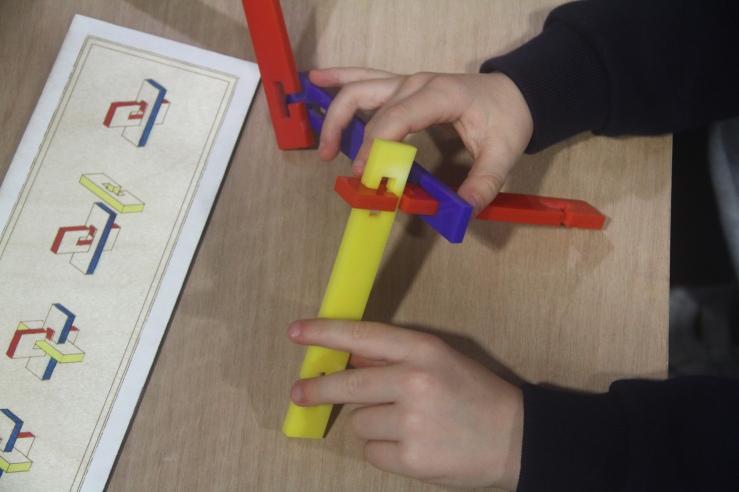
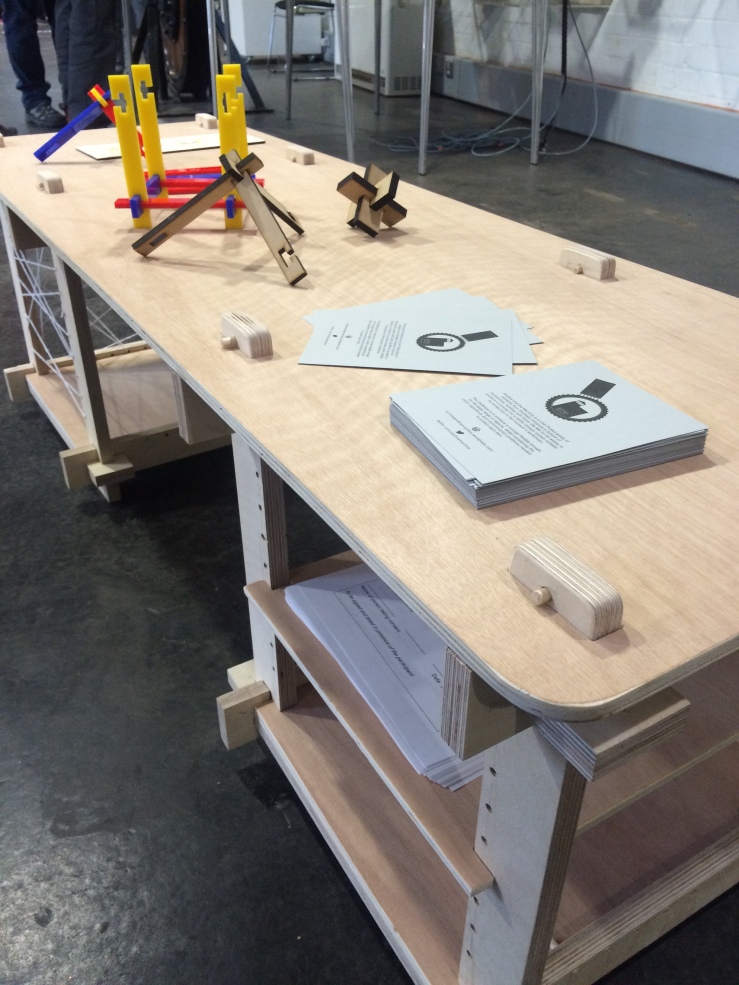
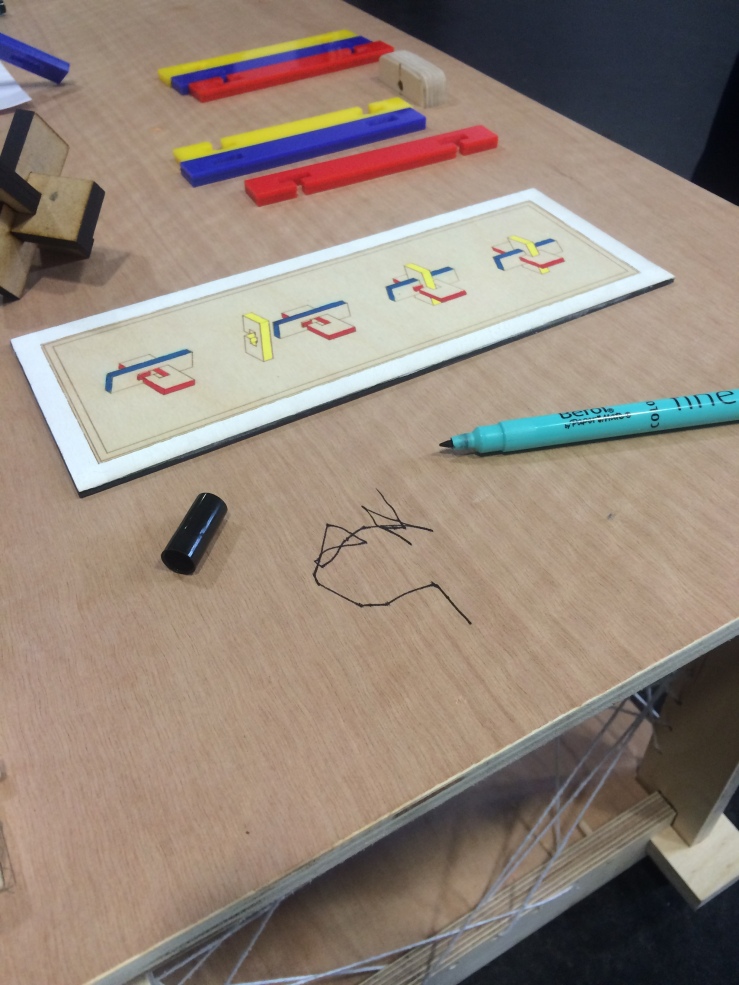
The most interactive part of the display was the puzzles, which are assembled in the same way as the joints of the modular display unit. A colour-coded diagram next to these puzzles gave hints of how to complete it, and allowed children and parents to try and assemble the joints without much direction. The puzzles were so popular that it was useful to have spares, as a few broke when children were forcing joints. It was also useful to have these on top of the modular unit, because we were able to verbally explain to people that the joints were assembled in that way, without glue or nails. Most people were very impressed by the knowledge that the units were constructed in this way, and often became more engaged as a result.
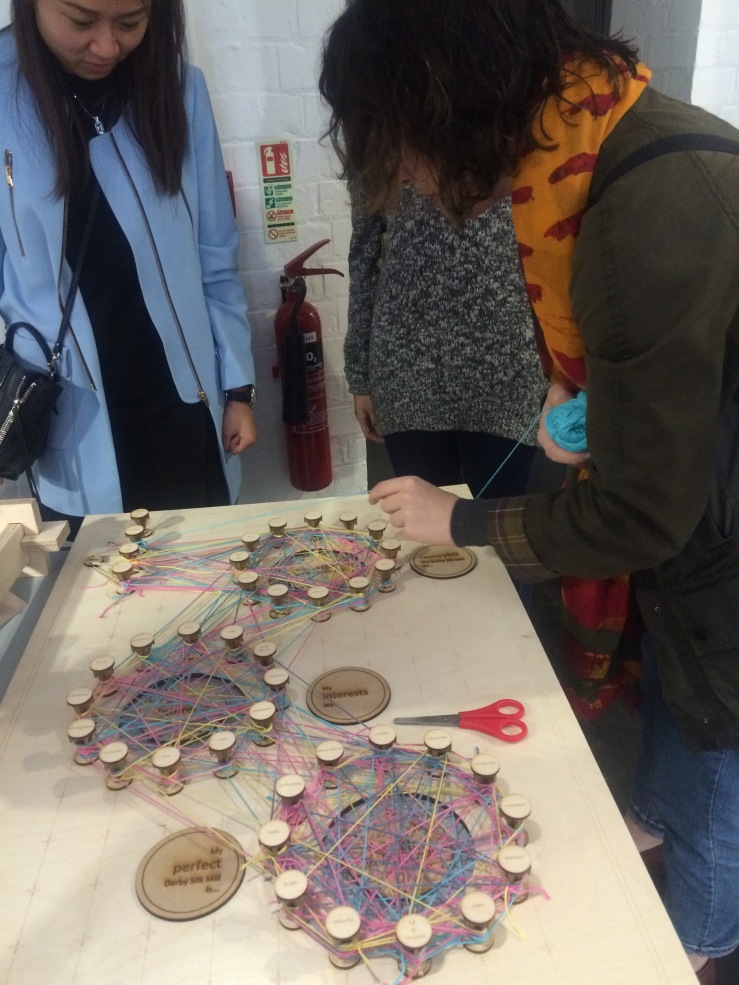
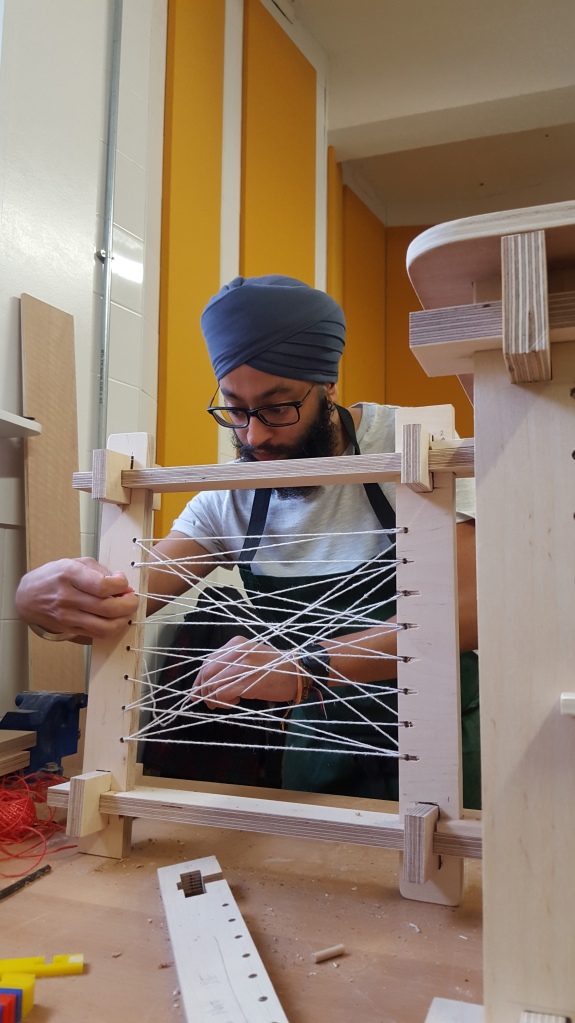
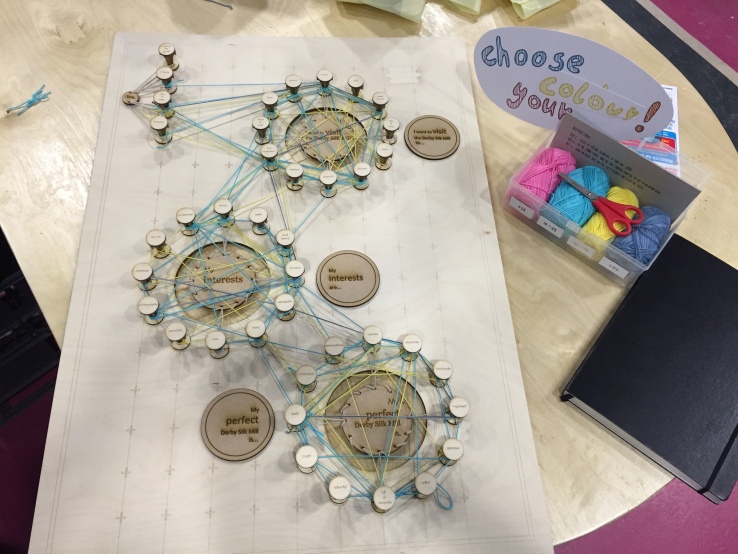
The questionnaire was another interactive aspect of the display, which became highly popular, with the encouragement of the group. This was not a traditional questionnaire, but was completed by taking a piece of string and winding it around pegs representing preferred answers. Most people held back from completing the questionnaire initially, and children often completed it first before parents were persuaded. The age groups completing the questionnaire were defined by the colour of the string, which was useful because the answers children gave were often different to the adults. By the end of the day we had built up a lot answers and were able to see a large spread of age groups had completed it. The age group that had the least answers was the 18 – 29 age group, which also represented the demographic at the event.
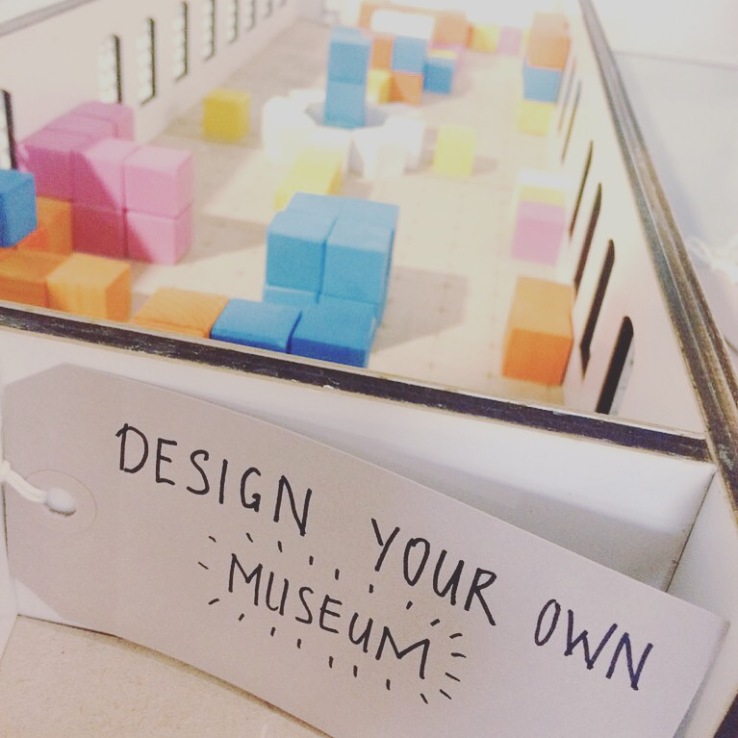
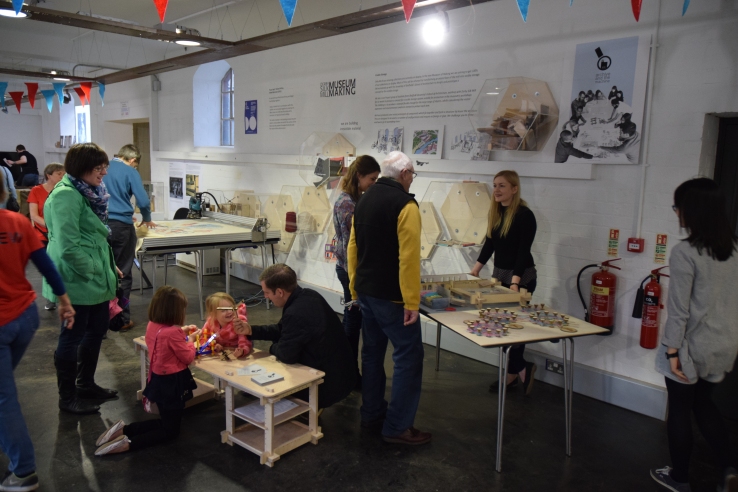
There was also a model entitled “design your own museum”, which was an open-top model of the second floor space in the mill. Coloured blocks representing different types of storage could be moved around within this model. This was not used as much as the other displays, although a few older children spent a lot of time, carefully laying out a display. This may be because it was placed on a taller table at the rear of the stall. However if this had been placed on top of the lower 1:2 scale model at the front of the stall, it could have been roughly played with and damaged.
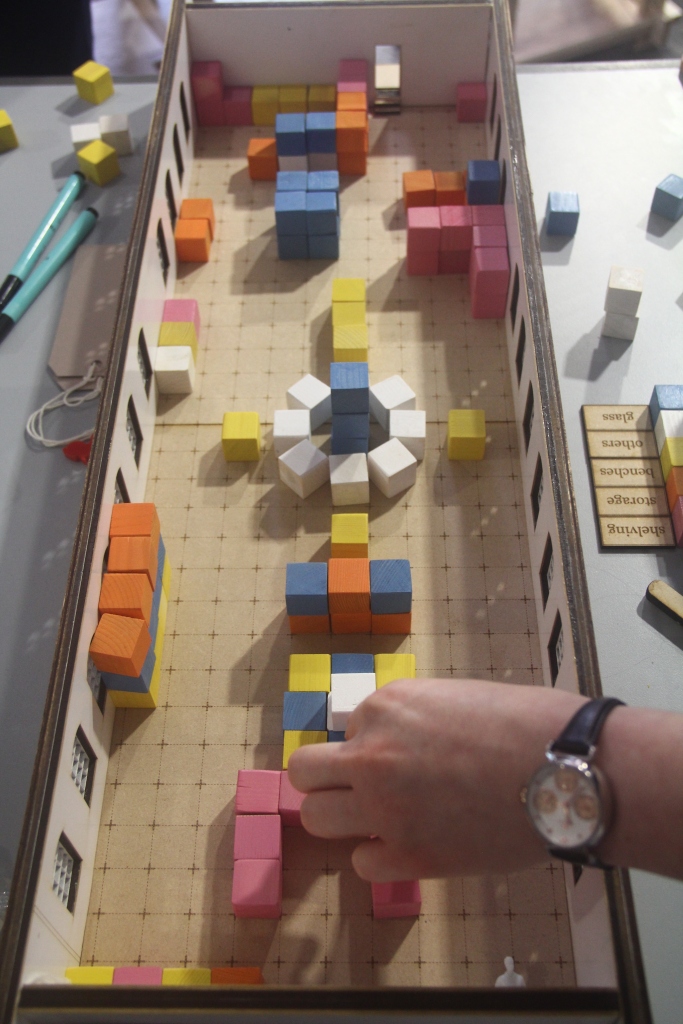
At the event the team and the client found that the “design your own museum” piece was a very useful tool for starting the thought process of how to configure the modular system. When participating in this you are instantly faced with decisions, such working with window placements, walking routes around the space, viewable height and so on. It also allows us to make many layouts quickly and assess the strengths and weaknesses each, and is therefore a tool that will be useful throughout the process.
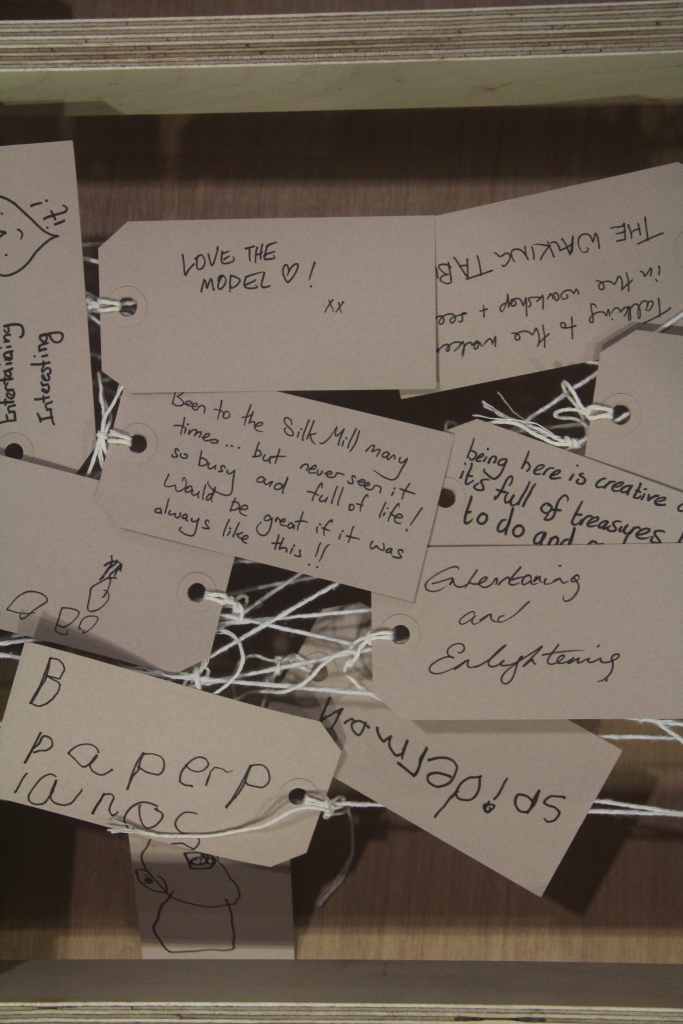
Another part of the stall was a stringboard, made from the same joints we were exhibiting. The public were able to write thoughts or memories of Derby Silk Mill on tags, which were then attached to the strings. By the end of the day we had many comments and pictures drawn by children.
Overall the stall at the Makers Faire was a success. We were able to engage the public with our ideas and let them know what we are doing. Many of the people we spoke to knew that there was a lot of items in storage that needed to be displayed, whilst others had never been to the mill before, and were surprised by the amount of creativity and historical interest within it. We received a lot of encouragement from the public about the ideas we were displaying, such as the joints that needed no glue or nails and the modular units.
One particular comment left on our stringboard read, “Been to the Silk Mill many times… but never seen it so busy and full of life! Would be great if it was always like this!!”. The Makers Faire was indeed a busy and exciting event, and that creativity and enthusiasm should be embodied in any future displays at The Derby Silk Mill.
In preparation for the makers fair, we aimed to produce a range of interactive features for our stall.
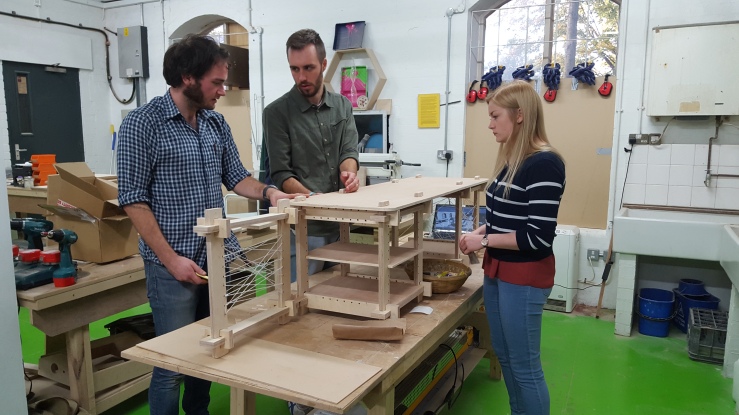
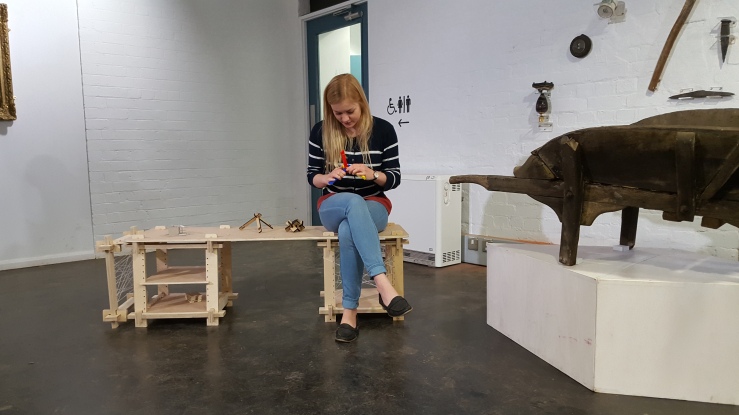
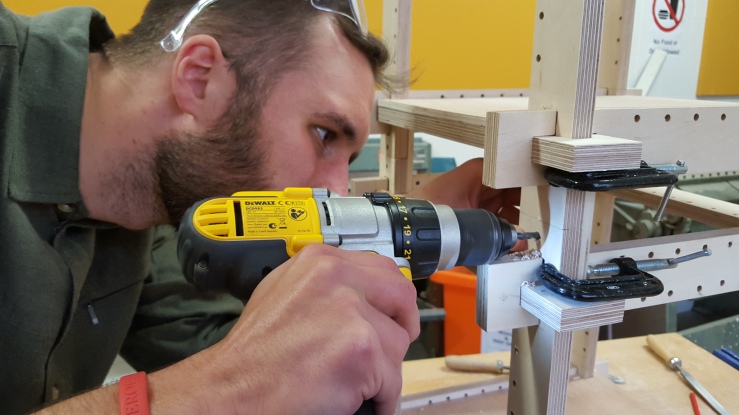
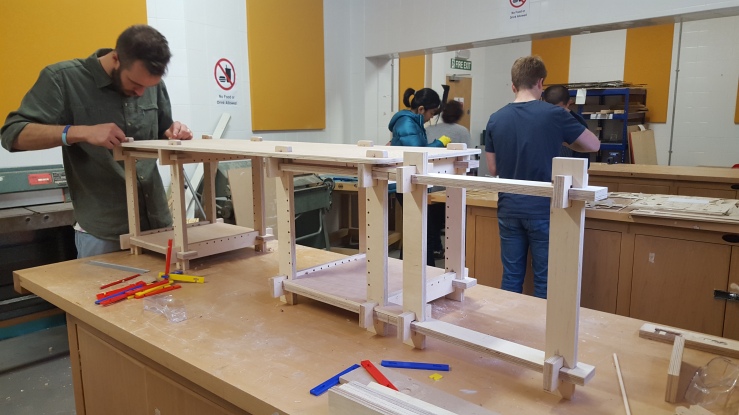
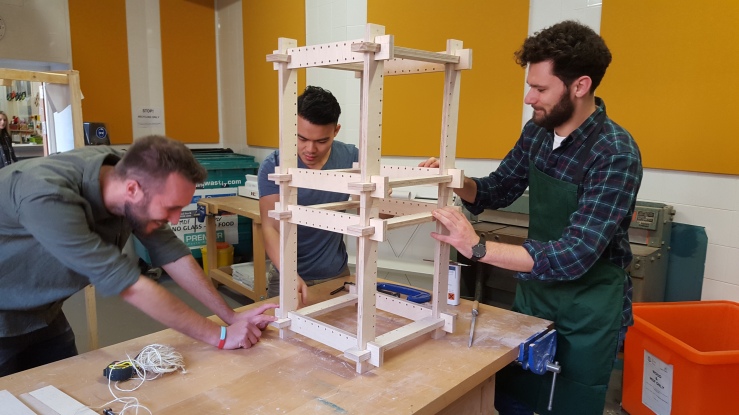
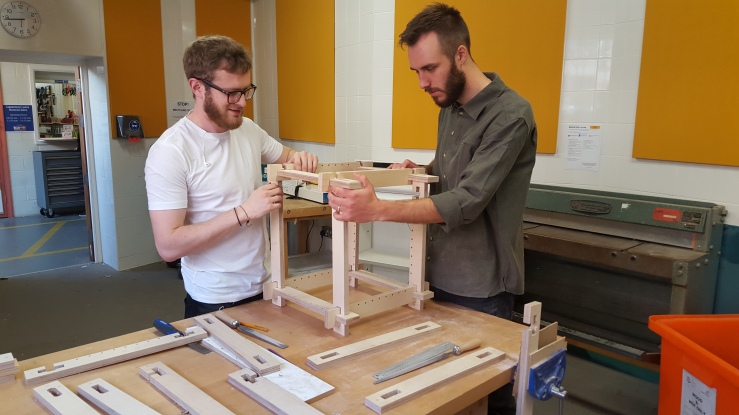
The main feature was to be our completed 1:2 scale prototype, which is two assembled units with a a surface slotted over the top. At this scale the prototype was the perfect height to be used as a bench, – an idea which could maybe be utilised by the Mill in the future as a form of easily-assembled seating. The prototype was taken to the Mill a couple of days in advance of the faire and shown to Daniel for the first time to gain his feedback, which was very positive!
Our question board will also be a vital part of our stall, as we were told that the footfall through the museum during the faire would be into the thousands. We plan to get as many people as possible from different age demographics to complete the Q board so that we can identify any trends emerging in the answers chosen.

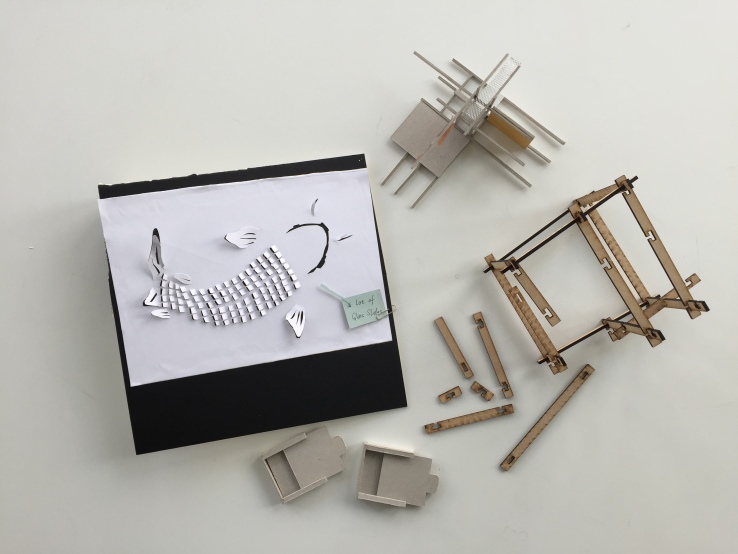
A scale model of the second floor of the silk mill was produced, as this is the area which we have been focusing on during the development of our ideas. To go alongside this, the group produced a number of wooden cubes scaled to be the same size as our prototypes would appear in the room. The cubes were spray painted in bright colours to represent different uses; ie the blue cubes were for artefact display, the yellow represents seating, the orange represents shelving and the pink cubes represent storage.
The cubes enable anyone to have a go at curating their own museum which we thought would gain valuable feedback for us and for the Mill, and can form a useful tool for the future curation of the space.
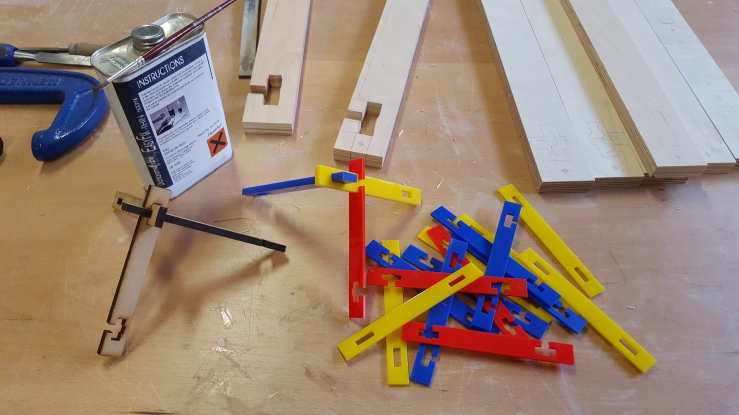
To help people understand how the joint works, many of our single joint prototypes will be present at the fair for people to have a go at piecing together. To make this easier, colour coded plastic versions were produced especially for public interaction. A diagrammatic instruction panel accompanied this to enable anyone to understand and construct the joint with ease.
In addition to physical models, we produced posters, visuals and leaflets to give general information about our project and details of our blog and twitter account. The visuals give an idea of how our prototypes can be adapted in many ways to accommodate the many different artefacts, and also indicate how they can be used to start to divide and form thresholds and different spaces within the museum’s large, open plan layout.
Finalising prototype in Sheffield for Makers Faire.
maker faire prep.
Brief, Revisited 
first 1:2 prototypes
More ideas, beginning of room model.
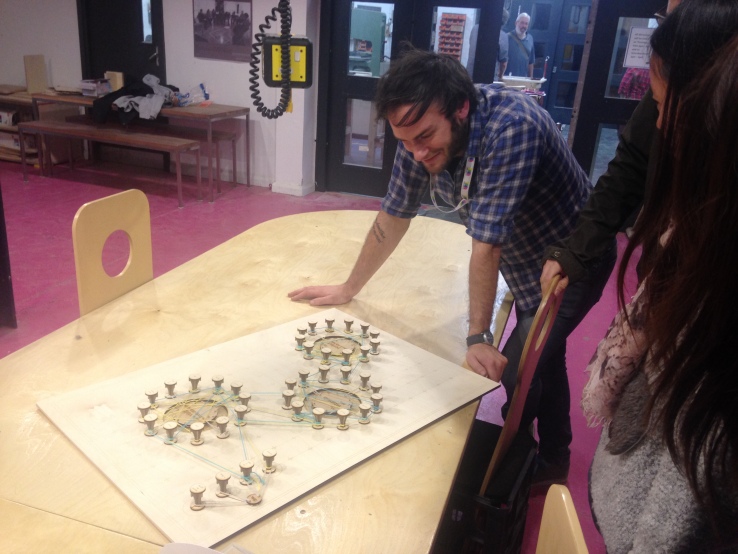
On Thursday we went to Open Make at the Silk Mill to drop off our questionnaire board for Daniel’s feedback and to experience what the museum’s Open Make night was like first hand. It was great to see Daniel’s enthusiasm for our questionnaire board and encouraging to see the museum staff excited to use it to give us their feedback.
One of the issues we had spotted with the design was that the threads of the answers would cover up the questions, so with the help of Graham, the Maker in Residence, we jumped on their laser cutter and 15 minutes later had a new set of questions to stick on the board.
After handing over the board to Daniel we had a look around the open make night. it was inspirational to see the breadth of knowledge and range of projects being undertaken in the Silk Mill’s Workshop.
There were varying levels of interaction between the makers from people discussing their ideas and sharing their knowledge and experience to people happily working away on their own projects.
One of the most impressive things on the night was the CNC machine that one of the makers had made on the DSM’s CNC machine that he was using to make another CNC machine.
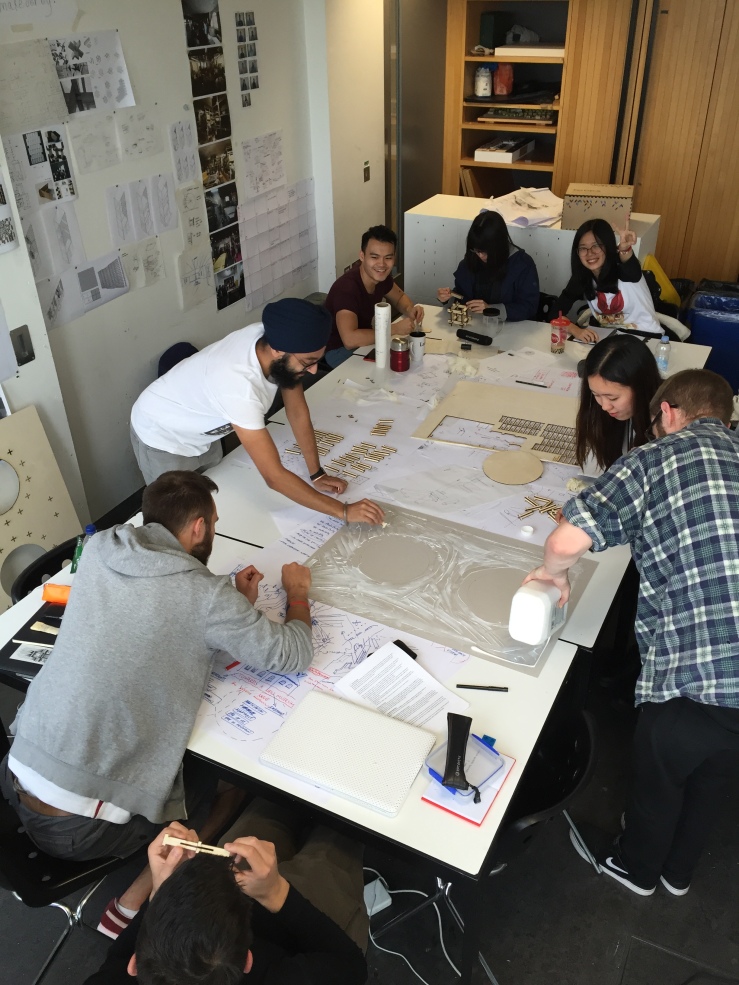
Below are close up shots of the final(ish) questionnaire board, as we thread the statement starters on and stick the answers on to the pegs we needed a first respondent…
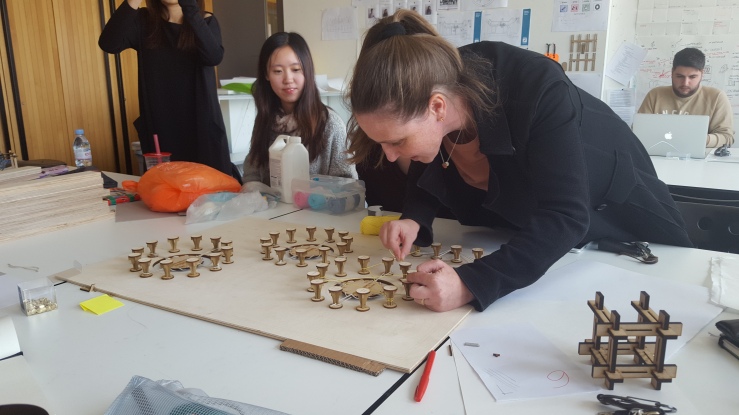
This morning, pre Derby, we made more adjustments to the questionnaire, changing the pegs to cut out quicker and also cutting questions into the board.
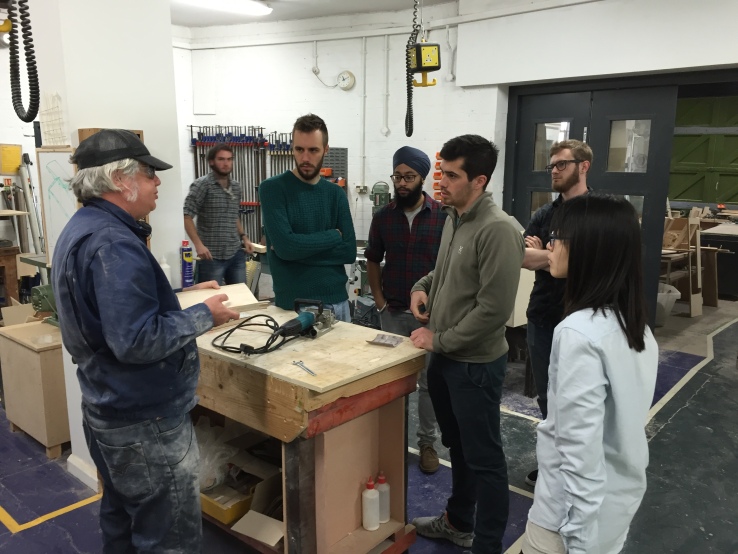
Once we arrived at the Silk Mill, Steve gave us an induction of the Silk Mill’s workshop so that we could be free to use the various tools and equipment on offer and also to get an insight on how the space is organised.
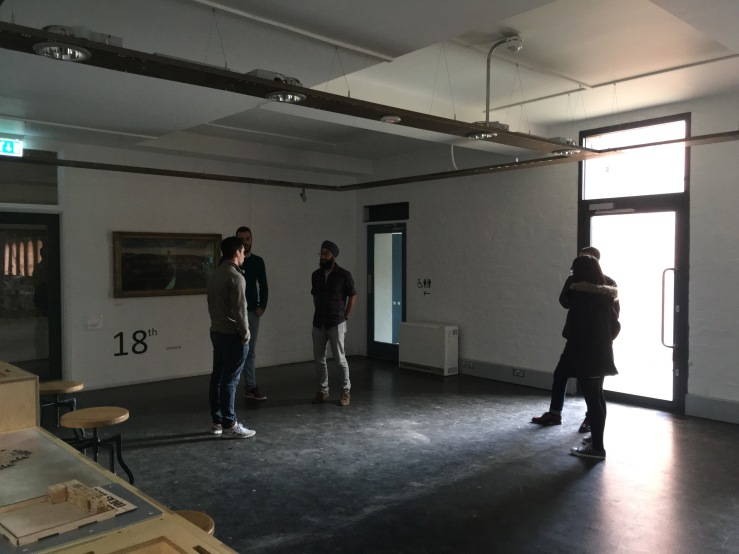
With the Derby Mini Makers Faire on the horizon, Daniel showed us the area that we had to play with, in between the workshop and the downstairs gallery space.
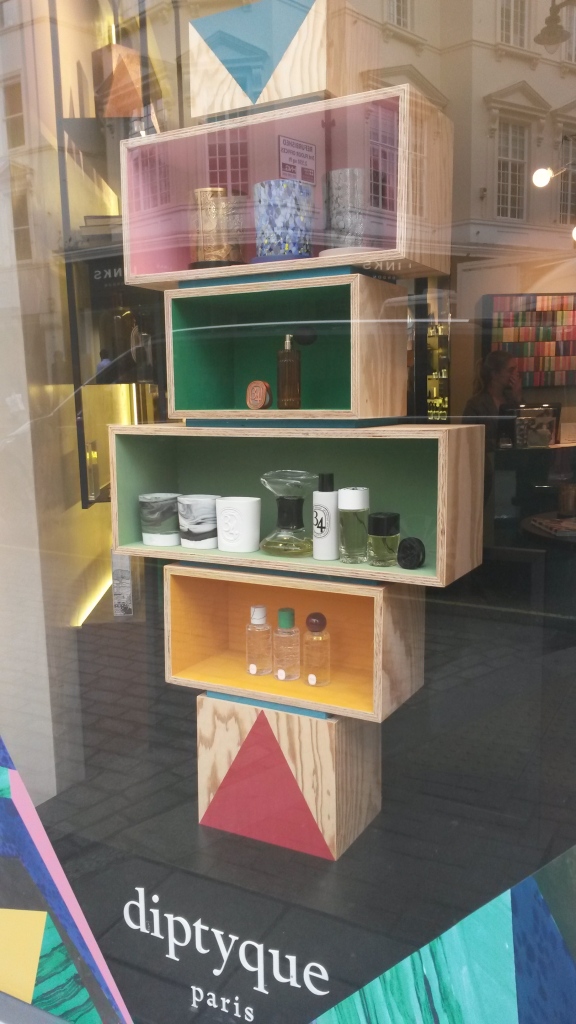
Spotted in London, a timber shop window display with a painted internal face.

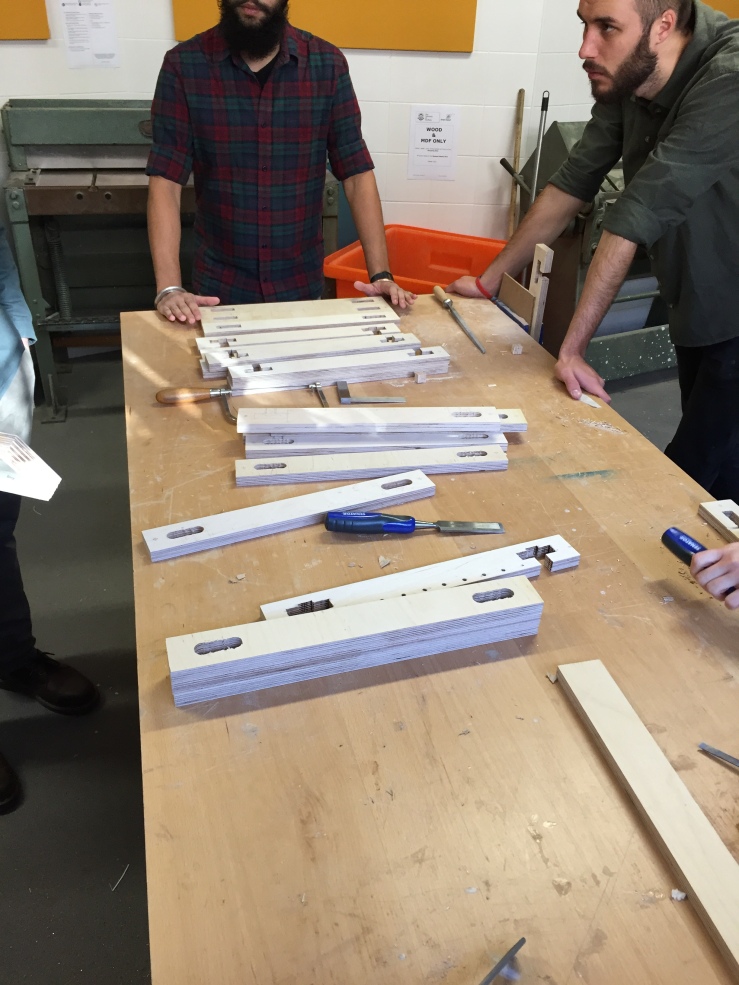
Today was another day of prototyping here in Sheffield. The burr jointed frame was re-cut to take into account the tolerances of 3mm MDF. The joint holes are relative to the material thickness. The intent is to display objects in the space within the frame, but there is an exercise here in determining how far the joint encroaches into this area.


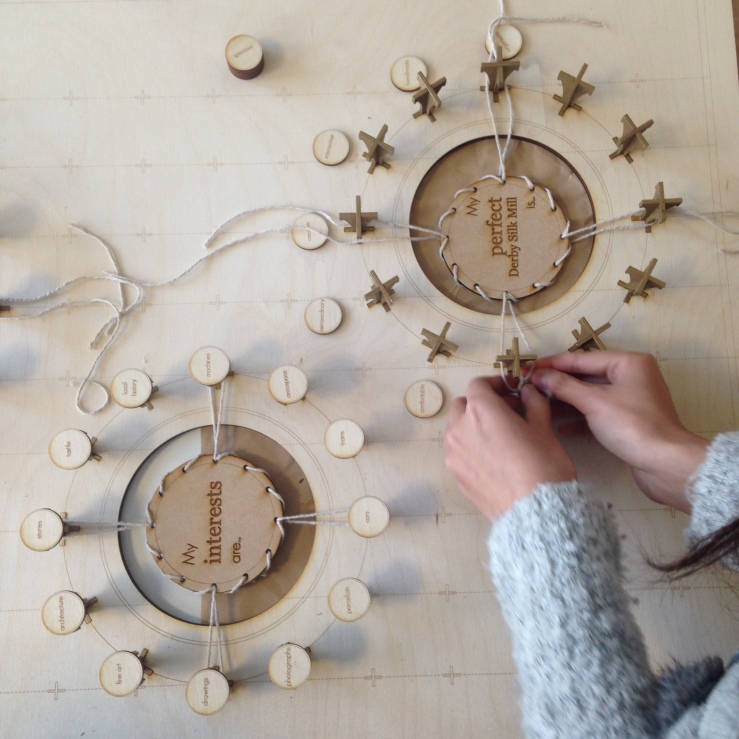
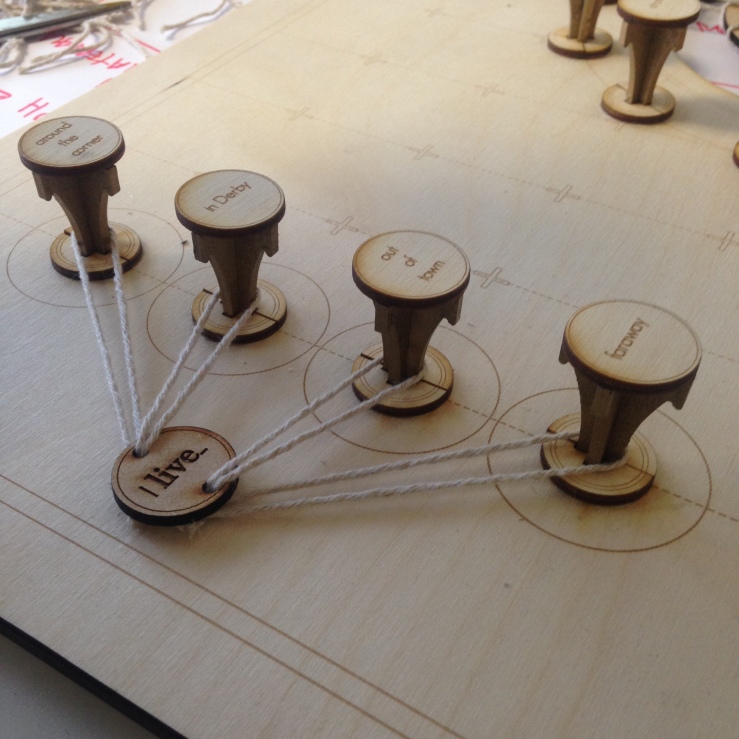
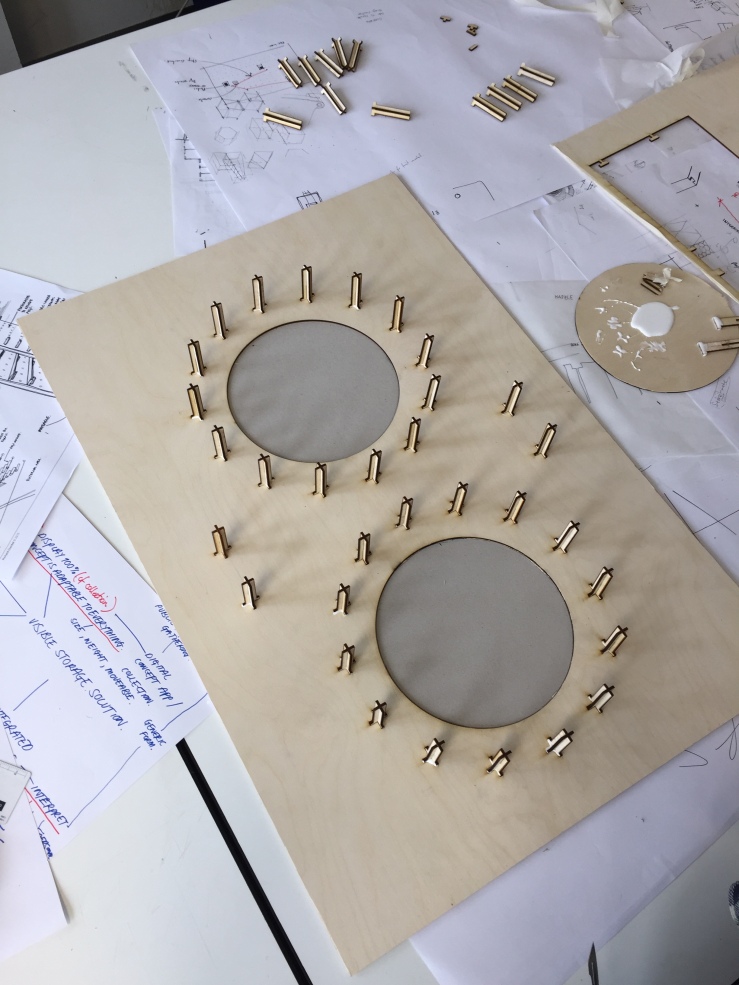
We developed a questionnaire board for visitors to create a statement about their views on the Silk Mill. Taking cues from the Mill’s history, respondents will be invited to wrap threads around pegs to create their statement with each peg belonging to a group of answers to the three statement starters; I live…, I like the Silk Mill because…, My ideal Silk Mill is…
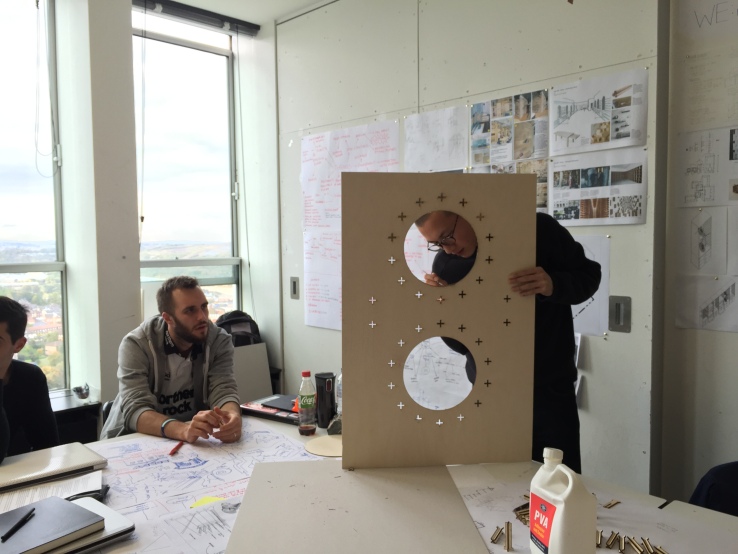
The cut out holes will allow the thread to be easily seen, with each + being the negative space for each peg to fit in.
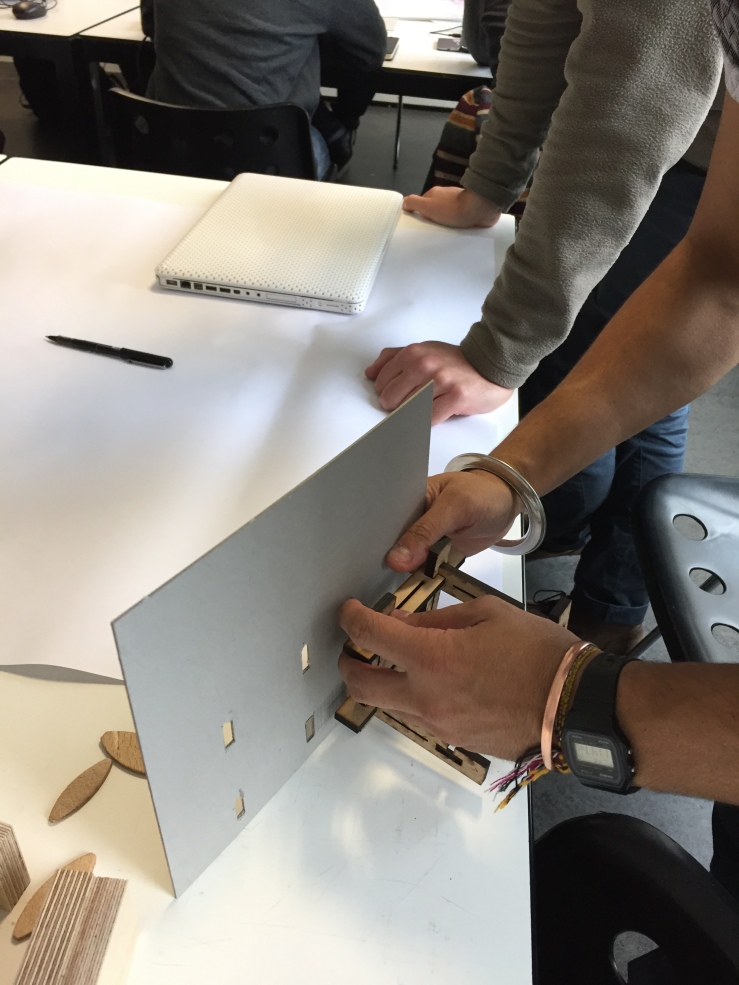
In this first prototype, in lieu of an extra sheet of ply, we glued the board to grey card and subsequently the pegs. The pegs are serrated to stop the thread from slipping. The fine serration is easily achieved through use of the laser cutter although this design greatly increases the cutting time.
This morning we caught up with our mentor Renata (Future Works) to discuss our ideas and strategies for tackling this ever widening brief.
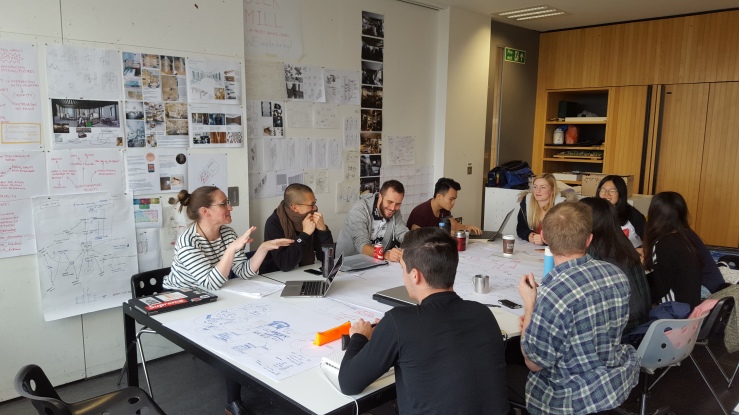
A few of us modelled the ideas that we were developing as well as attempting to model our generic responses to the Silk Mill.
[Image below:] Expanding upon a modular framed structure to create a larger, more explicit display area started a conversation regarding additive components that could serve different display requirements. Wall panels, hanging items and raised floor panels could be useful curating elements.

[Images below:] Two options for displaying the glass slides, one with individual units and another for a display collection creating a larger image.
[Image below:] Experiments with a burr joint. This joint expresses the structural nature of the unit but is essentially a puzzle.

